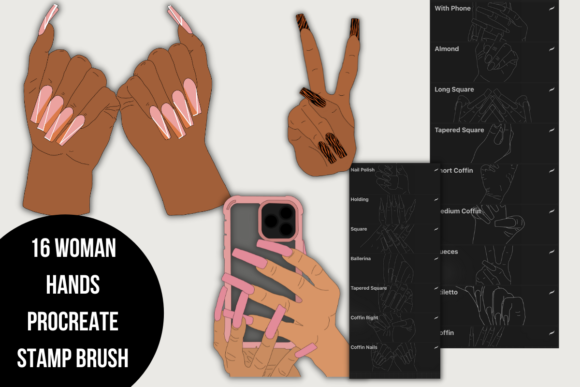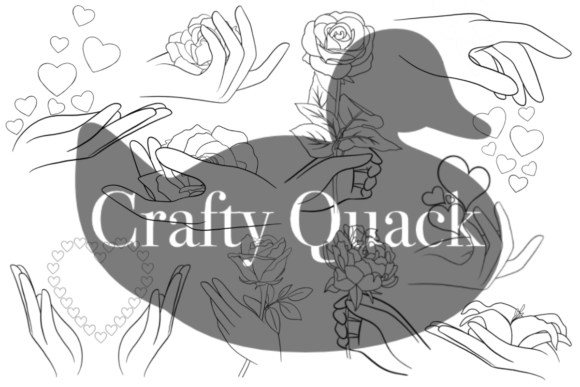
Maximizing Your Digital Art with Loving Hands Procreate Stamps
Digital illustration has evolved from a niche hobby into a vital tool for modern creatives, entrepreneurs, and small business owners. Whether you are designing wedding invitations, crafting social media content, or creating personalized greeting cards, the demand for high-quality, emotive assets is higher than ever. This is where Loving Hands Procreate Stamps enters the conversation. These digital brushes are not merely decorative elements; they are efficiency tools designed to infuse warmth and personality into your work without requiring hours of manual drawing. However, many users approach these assets with misconceptions that can hinder their creative potential.
Understanding how to properly integrate these stamps into your workflow is crucial. Many beginners assume that purchasing a brush set guarantees immediate professional results. In reality, the quality of your output depends heavily on how you manage layers, resolution, and composition. By avoiding common pitfalls, you can ensure that your projects—whether for Mother’s Day, anniversaries, or Valentine’s Day—maintain a polished, cohesive look.
The Misconception of "Plug-and-Play" Perfection
One of the most frequent mistakes creators make is treating Procreate stamps as static clipart rather than dynamic design elements. When you download Loving Hands Procreate Stamps, you are getting a toolkit, not a finished product. A common error is placing a stamp directly onto a background without adjusting its opacity, color, or blending mode. This often results in a flat, disconnected appearance that looks obviously digital and lacks the organic feel associated with hand-drawn art.
To avoid this, always consider the context of your project. If you are designing a Save the Date card, the stamps should complement the typography, not compete with it. Try reducing the opacity of floral or heart-shaped stamps to create a subtle watermark effect behind your text. Use blending modes like "Multiply" for darker tones or "Screen" for lighter highlights to integrate the stamp seamlessly into the paper texture or background color. This simple adjustment transforms a generic image into a bespoke design element.
Overlooking Resolution and Scale
Another critical oversight involves canvas size and resolution. Procreate is raster-based, meaning pixels matter. Users often create stamps at a small scale and then stretch them to fit a large format, such as a wedding banner or a high-resolution print. This leads to pixelation and a loss of detail, undermining the professional quality of the piece. Since Loving Hands Procreate Stamps are compatible only with Procreate, you must ensure your canvas settings match your final output requirements before you begin stamping.
Before applying any stamp, check your document DPI. For digital-only projects like Instagram posts or blog headers, 72 DPI may suffice, but for printed materials like birthday cards or anniversary gifts, aim for 300 DPI. Always apply stamps at their native size or slightly larger, never smaller, to maintain crisp edges. If you need a smaller element, it is better to reduce the canvas size or use a different stamp variant rather than shrinking a large one excessively.
Neglecting Layer Management
Efficiency in digital art is closely tied to organization. A frequent frustration among users is the inability to edit individual elements after they have been stamped. This happens when creators merge layers too early or stamp everything onto a single layer. If you place ten different floral elements on one layer, you cannot move, resize, or recolor them independently later. This rigidity forces you to start over if you notice a minor alignment issue, wasting valuable time.
Adopt a non-destructive workflow. Keep each stamp or group of related stamps on separate layers. Name your layers clearly, such as "Left Floral Border" or "Heart Accent." This practice allows you to tweak positions and colors effortlessly. For complex projects like wedding invitations, use layer groups to organize foreground, middle ground, and background elements. This structure not only saves time during revisions but also makes it easier to export specific elements for other uses.
Ignoring Color Harmony
While Loving Hands Procreate Stamps come with predefined colors, relying solely on these defaults can limit your creative expression. A common mistake is using the default black or brown for every project, regardless of the color palette. This can make designs feel repetitive and uninspired. Instead, utilize Procreate’s color picker and hue/saturation adjustments to customize the stamps to match your brand or event theme.
For example, if you are creating a Valentine’s Day graphic, do not settle for standard red. Experiment with muted mauves, soft pinks, or even unexpected pastel blues to create a modern, sophisticated look. Use the "Hue, Saturation, Brightness" tool under adjustments to shift the entire stamp’s tone instantly. This flexibility ensures that your assets feel cohesive with the rest of your design, enhancing the overall visual harmony.
Choosing the Right Stamps for the Occasion
Not all stamps are suitable for every project. Understanding the nuance of each design within the Loving Hands Procreate Stamps collection is key to effective communication. Here are ten unique stamps included in the set and their ideal applications:
- Delicate Vine Border: Perfect for framing wedding invitations or elegant birthday cards.
- Hand-Drawn Heart Cluster: Ideal for Valentine’s Day social media posts or love letters.
- Rustic Leaf Sprig: Adds an organic touch to autumn-themed announcements or eco-friendly branding.
- Minimalist Line Flower: Suitable for modern, clean designs like corporate thank-you notes.
- Whimsical Star Burst: Great for celebrating milestones, birthdays, or achievements.
- Vintage Ribbon Banner: Excellent for highlighting text in Save the Date cards.
- Soft Cloud Shape: Adds dreaminess to baby shower invites or gentle reminders.
- Geometric Dot Pattern: Provides subtle texture for backgrounds in digital planners.
- Classic Envelope Icon: Useful for contact pages or newsletter headers.
- Celebratory Confetti Scatter: Adds energy to party invitations or promotional graphics.
Selecting the appropriate stamp ensures that your design communicates the right emotion. A whimsical star might clash with a formal wedding invitation, just as a delicate vine might get lost in a bold, modern poster. Match the style of the stamp to the tone of your message.
Final Checks Before Exporting
Before finalizing your project, take a moment to review your work at actual size. Zoom out to see the overall composition. Check for alignment issues, color consistency, and balance. Ensure that no stamp overlaps crucial text in a way that hinders readability. Remember, these tools are meant to enhance your message, not obscure it.
By approaching Loving Hands Procreate Stamps with a strategic mindset, you avoid the common traps of poor integration and rigid workflows. Focus on layer management, color customization, and contextual appropriateness. These practices will elevate your digital creations, making them stand out in a crowded market. Whether you are a freelancer delivering client work or a hobbyist creating personal keepsakes, mastering these details ensures that every project receives the loving touch it deserves.