Mastering Realistic Textures with Procreate Oil Brush 21 Dry Canvas Textur
Digital painting has evolved significantly, moving far beyond flat vectors and smooth gradients. Today, artists crave the tactile resistance of traditional media, seeking tools that replicate the friction of bristles against woven fabric. This is where Procreate Oil Brush 21 Dry Canvas Textur enters the conversation. It is not merely a digital asset; it is a bridge between the physical sensation of painting and the convenience of an iPad. However, simply downloading a brush does not guarantee a masterpiece. Many creators stumble not because they lack talent, but because they misunderstand how to leverage specialized tools like this one effectively.
The appeal of this specific brush lies in its ability to mimic dry on dry techniques. Unlike standard digital brushes that lay down uniform color, this tool captures the irregularity of real-life brush strokes. It allows for the buildup of pigment, creating depth that feels organic rather than computed. For those interested in impressionism, abstract painting, or even hyper-realistic portraits, understanding the nuance of this tool is critical. Let’s explore common pitfalls artists face when integrating such specialized assets into their workflow and how to avoid them to achieve truly painterly results.
Misunderstanding the Role of Canvas Texture
One of the most frequent mistakes beginners make is ignoring the interaction between the brush tip and the canvas grain. The Procreate Oil Brush 21 Dry Canvas Texture Realistic Oil Painting Brush for Procreate is designed to interact with surface textures. If you are painting on a completely smooth, default digital layer, you will miss out on the "tooth" that makes the brush feel authentic.
Many users complain that the brush looks too soft or lacks definition. In reality, the issue is often the background. To get the full effect, you must enable a canvas texture overlay or use a paper grain layer beneath your work. Without this friction, the dry brush effect cannot catch the highlights of the weave, resulting in a flat appearance that defeats the purpose of using a high-quality simulation tool. Always check your canvas settings before starting a piece intended to look like traditional media.
Overlooking Pressure Sensitivity Settings
Another common oversight involves device calibration. This brush relies heavily on pressure sensitivity to simulate the weight of paint. If your Apple Pencil settings are not optimized, or if you are pressing too hard consistently, you lose the subtle variations that define oil brush strokes.
A heavy hand can saturate the digital bristles instantly, eliminating the textured gaps that characterize a dry on dry application. Instead, practice a lighter touch. Allow the brush to skip across the screen slightly. This technique mimics how a real brush with limited paint interacts with a rough surface. Adjusting the flow and opacity limits in the brush settings can also help maintain control, ensuring that each stroke builds up gradually rather than appearing as a solid block of color.
Confusing Mediums: Oil vs. Acrylic vs. Gouache
While this tool is labeled as an oil brush, its versatility often leads to confusion regarding its best applications. Some artists attempt to use it for sharp, graphic lines typical of vector art, leading to frustration. Conversely, others try to blend it extensively like a soft acrylic brush or a watery gouache brush, which can muddy the distinct textural qualities.
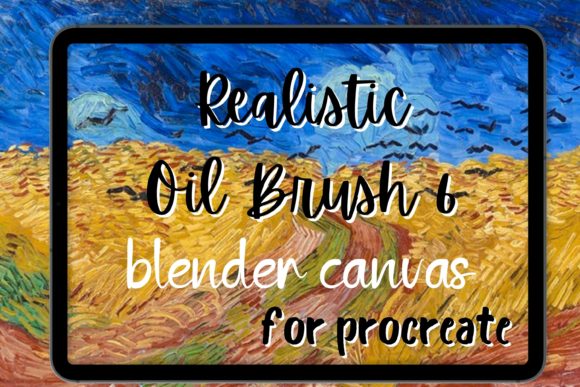
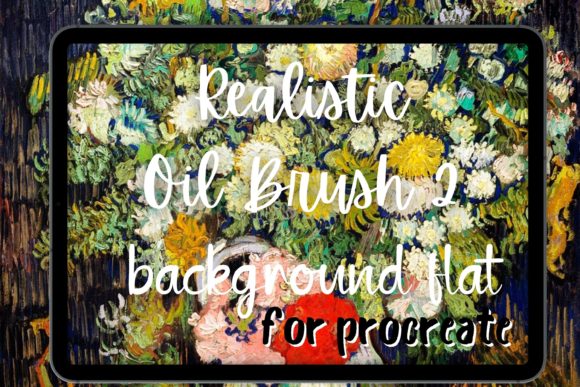
The strength of this brush is in its impasto-like capability. It shines when you want visible, deliberate marks. Think of the swirling, thick applications seen in a Van Gogh oil painting. If you are aiming for a smooth, airbrushed finish, this is not the right tool. However, if you are looking to create a Van Gogh brush effect or emulate the chaotic energy of procreate Van Gogh style works, this brush is ideal. Recognizing the intended aesthetic prevents wasted time trying to force the tool into an incompatible style.
Neglecting Color Mixing Strategies
In traditional painting, colors mix on the palette or directly on the canvas. In Procreate, many artists rely solely on the color picker. When using a textured brush like this, picking colors directly from the wheel can result in a disjointed look. The brush’s texture reveals the underlying layers, so if those layers are not harmonized, the painting will look noisy rather than cohesive.
A better approach is to use the smudge tool sparingly or to layer colors manually. Start with a mid-tone base, then use the Procreate Oil Brush 21 Dry Canvas Textur to add highlights and shadows. This method respects the physical logic of painting, where light sits on top of darker values. By building up layers, you enhance the three-dimensional illusion of the paint itself, making the canvas texture pop through the thinner areas of your strokes.
Choosing the Right Bundle for Your Needs
When evaluating a Procreate bundle that includes this brush, do not just look at the number of items included. A large bundle with fifty mediocre brushes is less valuable than a curated set of ten high-performance tools. Check if the bundle includes complementary tools, such as blending stumps, palette knives, or textured backgrounds.
Ensure that the brush is compatible with your version of Procreate. Updates to the app can sometimes alter how brush engines behave. Reading recent reviews or checking the creator’s update history can save you from purchasing outdated assets. Furthermore, consider whether the bundle offers tutorials. Understanding the theory behind impressionism or abstract composition can be just as valuable as the brush itself.
Practical Steps for Better Results
To maximize the potential of this tool, consider these actionable steps:
- Test on a Sample Layer: Before starting your main artwork, create a test layer. Experiment with different pressure levels and angles to see how the bristles react.
- Use Reference Images: Study real Van Gogh oil paintings or other impressionist works. Observe how the paint direction follows the form of the subject. Mimic this directional flow in your digital strokes.
- Limit Your Palette: Restricting your color choices can help unify the textured strokes. A limited palette forces you to focus on value and texture rather than getting lost in endless hue variations.
- Zoom Out Frequently: Textured brushes can look chaotic up close. Regularly zoom out to ensure the overall composition remains clear and the texture serves the image rather than distracting from it.
Ultimately, the Procreate Oil Brush 21 Dry Canvas Texture Realistic Oil Painting Brush for Procreate is a powerful instrument for those willing to learn its nuances. It requires a shift in mindset from digital precision to organic imperfection. By avoiding common mistakes related to canvas setup, pressure control, and medium expectations, you can unlock a level of realism and artistic expression that rivals traditional media. Whether you are a hobbyist exploring abstract painting or a professional illustrator seeking a unique edge, mastering this tool can elevate your digital artistry significantly.